To configure the sensor you need the turfRad mobile app. Please download the turfRad app from the App Store or Google Play Store. Once you have installed the app, follow the steps on the next pages.
Once you downloaded the App follow this steps:

1. Open the turfRad app, read and accept the terms and conditions when prompted.
2. The app searches via Bluetooth for your turfRad sensor. Note: Donot pair or connect to the turfRad in your phone settings; the app handles this part.
3. Click ”Connect” on your turfRad device to start the configuration. If you have multiple sensors, repeat steps 3-16 for each sensor.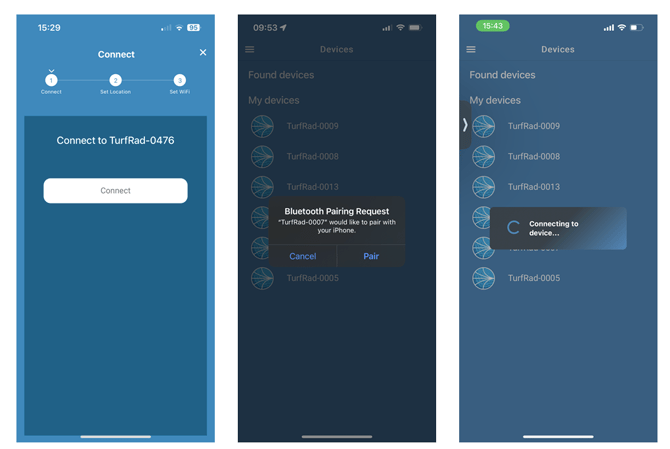
4. Press the ”Connect” button to connect to the sensor over Bluetooth.
5. Allow the turfRad to ”Pair” with your phone. This step will look slightly different on an Android device.
6. The app connects to the device.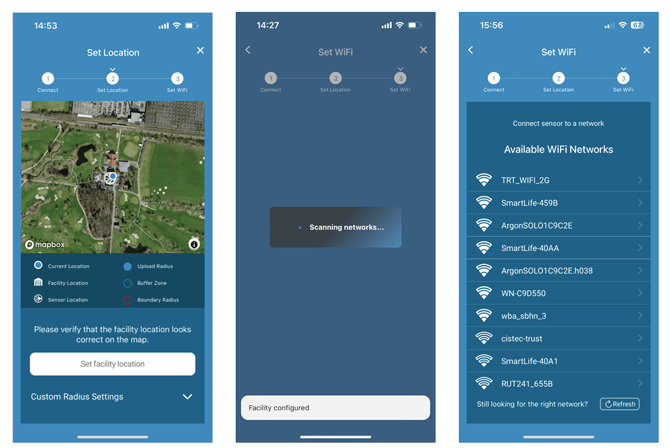
7. Your phone location (blue dot) and sensor location (white logo) are shown on the map. Once you see both, press ”Set facility location”.
8. You will see a ”Facility configured” confirmation on the screen and the sensor searches for WiFi networks within range.
9. Select your WiFi network from the list of networks. If you don’t immediately see your network, hit refresh.
Note: If you do not see the sensor icon in step 7. Make sure the GPS antenna is connected and has a clear view of the sky. It can take up to 20 minutes to get GPS signal the first time you power on the sensor. If you only just powered on the sensor, wait a few minutes and try again.
Note: If the blue Current Location dot is not showing at your accurate location you may need to enable ”Accurate Location” in your phone settings.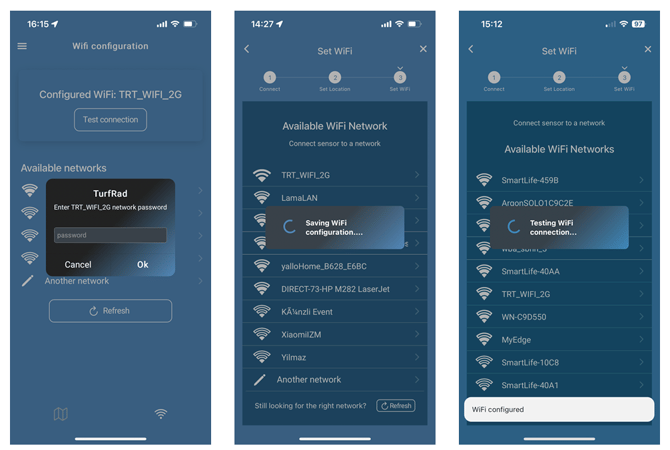
10. Enter the password for your WiFi network and click OK. Note: Your phone might automatically capitalize the first letter!
11. Your WiFi details are stored on the turfRad sensor.
12. The app performs a check on your WiFi network to confirm that the turfRad has the connectivity necessary.
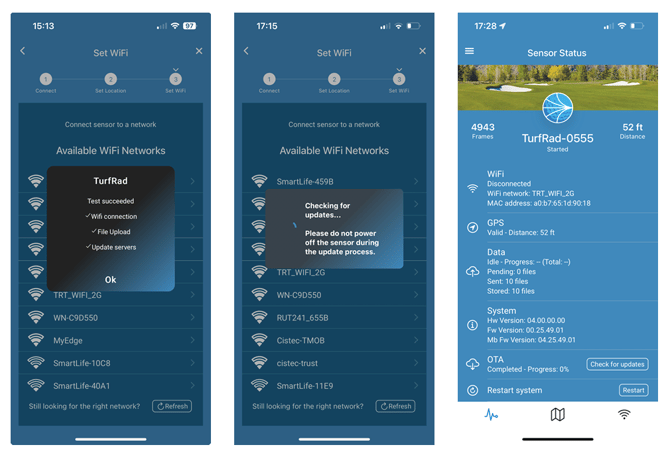
13. Upon completion of the WiFi test, you get the test report. Contact your IT department or visit the turfRad Help Center if any of the steps are not successful after 2-3 attempts. The ”Update Servers” step requires port 8883 to be allowed on the firewall.
14. After successfully connecting to WiFi, the app will check to make sure your sensor has the latest firmware installed. Updating may take up to 10 minutes. During this time, the function light on the sensor will flash quickly.
15. After completing the setup wizard, you are brought to the default ”Sensor Status” screen.


16. You can check the facility radius configuration by clicking the map icon in the bottom menu. if the upload radius overlaps your scan areas, you need to shrink the radius by setting a custom radius in the following section.
17. Click the horizontal lines on the top left and select ”Disconnect” to go back to the list of saved devices.
18. You will see double-check marks and the words ”set up” indicating that your sensor has been successfully set up. Important: If you are configuring more than 1 sensor you need to repeat steps 3-16 for each sensor!
Congratulations! You have successfully set up your sensor! You can now drive onto the course and the measurement will start automatically.