
 1. Insert the connecting tubes and tighten the set screws with the supplied allen key. The rivets in the tubes should align and sit under the set screws.
2. Insert and tighten the long tubes into the rear corner brackets. The small hole in each long tube should face up and down.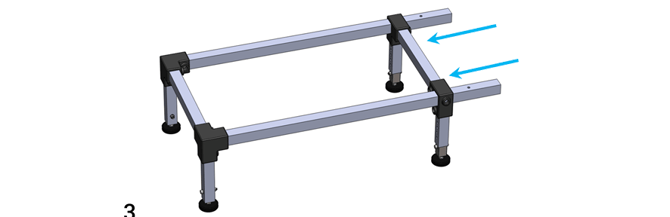
3.Slide the front leg assembly on the long tubes. The position of the front legs can be adjusted, but maximum distance between rear and front legs should be achieved. This will depend on vehicle make and model. A small distance between the rear and front legs increases the chance of the sensor falling off the mower! Do not fully tighten front leg set-screws until after step 8 & 9 or else you may deform the aluminium long tube or struggle to insert the sensor!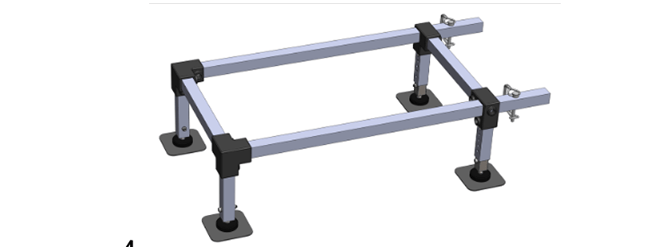
4. Attach and center the steel plates on the magnets. Careful not to pinch yourself, the magnets are strong!
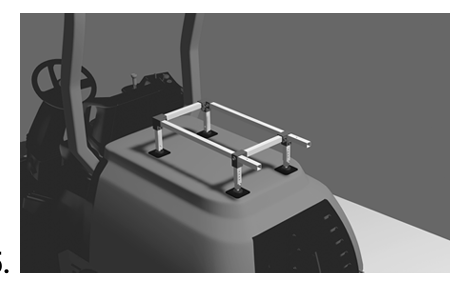
5. Thoroughly clean and dry the mounting surface (alcohol wipe recommended) before exposing the VHB adhesive to the vehicle. Remove the adhesive backing from the VHB on the steel plates and mount the structure square on the vehicle cowling. Center the mountframe andfirmly press the plates down on the surface. The VHBadhesive will take 24 hours to fully set before achieving full strength. Use care when removing the mount structure from the plates before the adhesive is fully set.
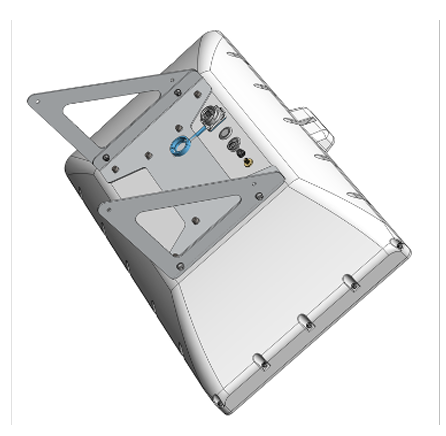
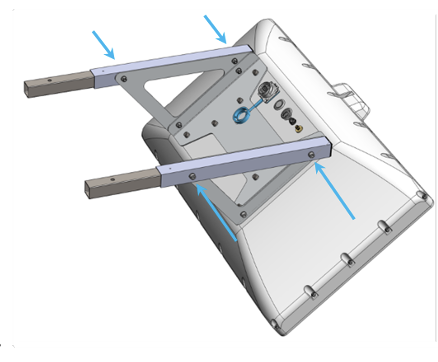
6. Mount the aluminium triangles to the sensor backplate with the hardware provided in the sensor box. Place one washer on the bolt side and one on the nut side.
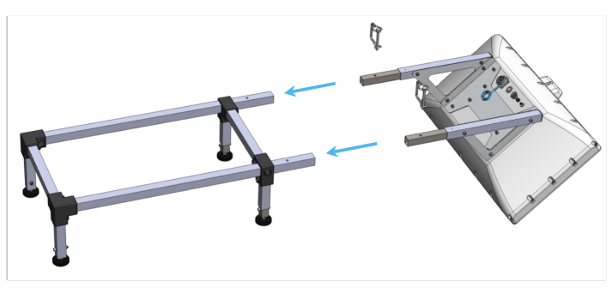
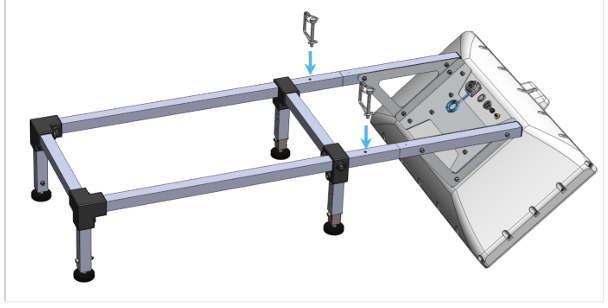
7. Mount the aluminium triangles to the mount tubes with the hardware provided in the mount box. Place one washer on each side.
8. Insert the stainless steel extension tubes into the long tubes. The single vertical thru-hole in the steel extensions shouldalignwiththe hole in the long tube.
9. Insert the locking pins through the long tube and steel insert tube to hold the sensor extension in place.
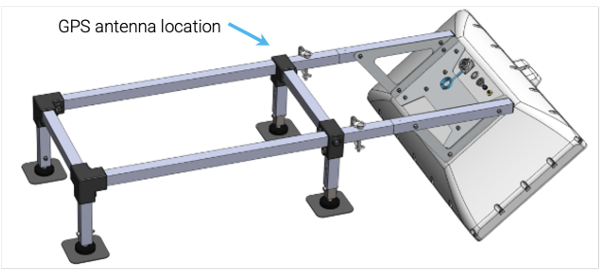
10. The above image shows where the GPS antenna should be placed. It is magnetic and will stick to the connector. The loose and excess cable can be fixed with zip-ties.

11. Use the provided strap to secure the sensor to the cowling. This will ensure stability in rugged terrain.