![turfrad_logo_outlines (1)-1.svg]](https://support.turfrad.com/hubfs/turfrad_logo_outlines%20(1)-1.svg)
Table of Contents
This manual will guide you step by step through the assembly and set-up of your turfRad Toro Mount. It is structured in 3 sections:
-
Assembly of the Mount
-
Installation to a Toro Reelmaster 5010
-
Installation to a Toro Reelmaster 35XX
 Care and Maintenance
-
Clean the powder coated steel frame with a damp cloth or low-pressure hose. Avoid harsh chemicals and abrasive cleaners.
-
Inspect all screws and locknuts periodically and re-tighten as needed. Do not over-torque — tighten firmly by hand with the supplied allen key.
-
In high-vibration environments, apply medium-strength thread-locking compound (e.g. Loctite 243) to prevent screws from loosening over time.
- Touch up any chipped or scratched areas with metal primer to prevent rust.
- If the sensor is malfunctioning, consult your local distributor or visit https://support.turfrad.com/.
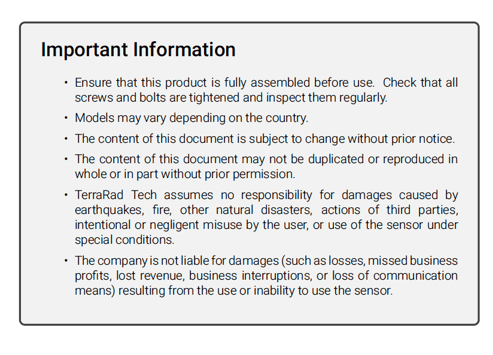 What's in the box
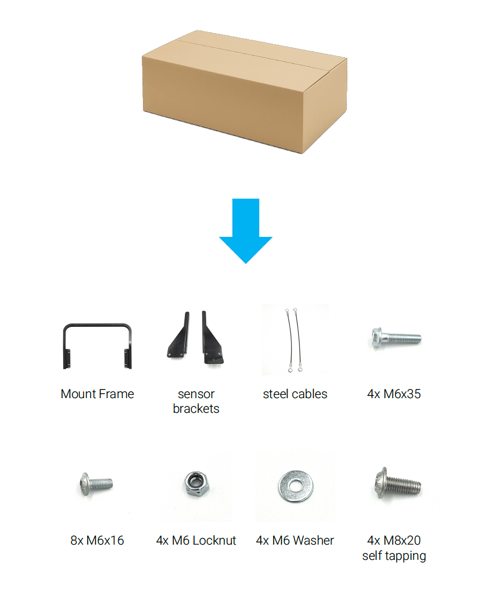
Assembly Mount
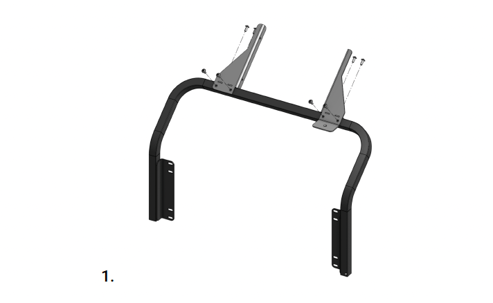
Attach the sensor support brackets to the top bar of the mount frame. Insert and tighten the four M6x16 screws using the supplied allen key.
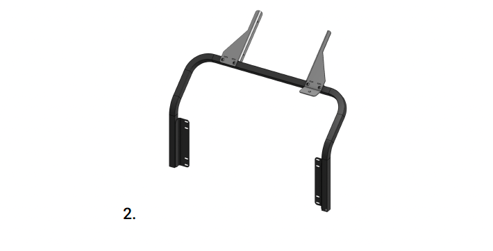
The image above shows the fully assembled Toro Mount frame. Verify all screws are tightened securely before continuing.
Assembly 5010
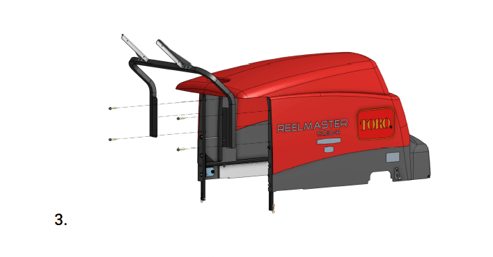
On the back of the Toro Reelmaster, unscrew the existing bolts at the mounting locations on the vertical legs. Align the mounting brackets and secure them to the mower using the provided M6x35 screws, washers, and M6 locknuts.
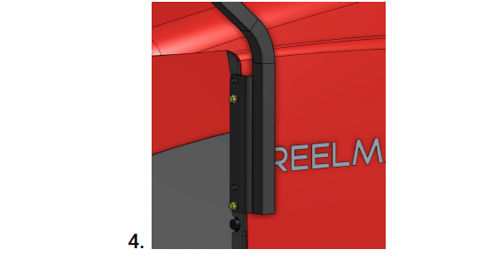
Tighten all screws on each mounting bracket firmly using the supplied allen key. Follow the screw pattern shown in the image for the Toro Reelmaster 5010. Ensure all attachment points are secure before placing the sensor.
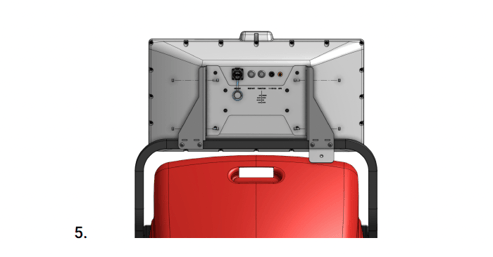
Attach the turfRad sensor to the support brackets from below. Secure the sensor using four M5x12 screws and M5 locknuts, one at each corner of the support brackets.
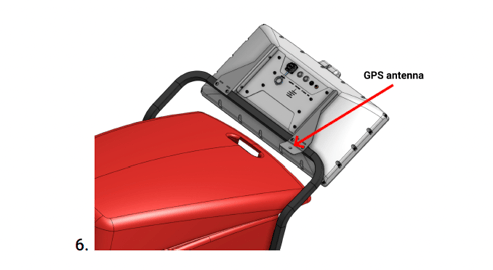
Place the GPS antenna in the position shown on the back of the sensor. The antenna is magnetic and will attach securely to the sensor housing. Connect the black cable to the gold GPS connector.
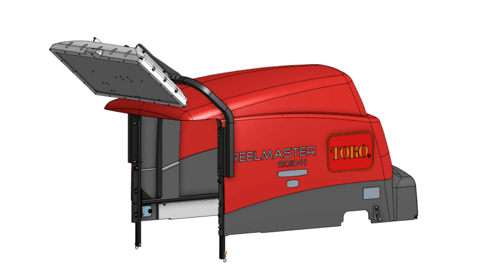
Assembled turfRad

The included steel cables can be used to retain the hood in the open position, preventing the sensor from touching the ground. Attach one end to the hood and the other to the mower frame using the provided M8x20 self-tapping screws.
Assembly 35XX
Follow steps 1 and 2 from the Assembly Mount section above to assemble the mount frame, then continue with the steps below.
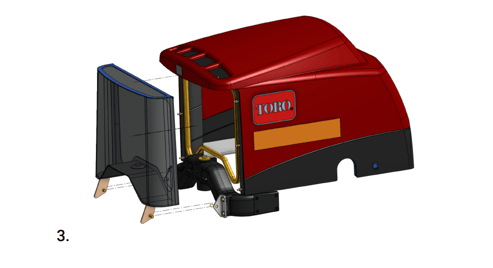
Remove the hood from the Toro Reelmaster 35XX series by unbolting and lifting it off the mower. Next, unscrew and remove the front side grill panel.
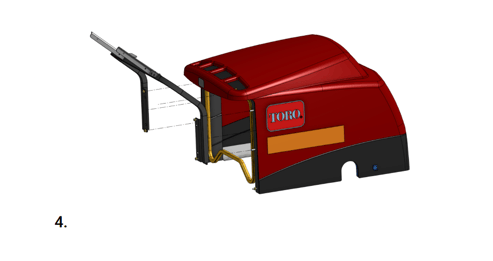
Position the Toro Mount frame on the left side of the mower and align the mounting brackets with the existing bolt holes on the mower frame. Secure the mount using the provided M6x35 screws, washers, and M6 locknuts.
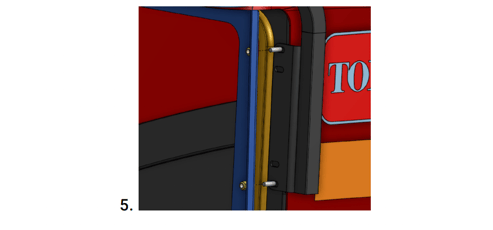
Position the Toro Mount frame on the left side of the mower and align the mounting brackets with the existing bolt holes on the mower frame. Secure the mount using the provided M6x35 screws, washers, and M6 locknuts.
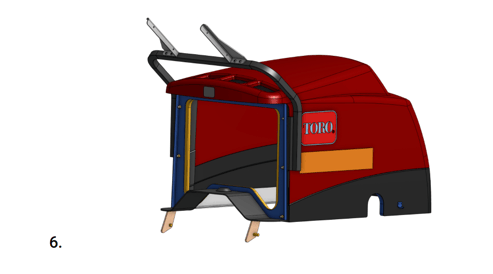
Place the grill panel back against the mower, sandwiching the mount brackets between the panel and the mower frame. Secure all screws firmly.
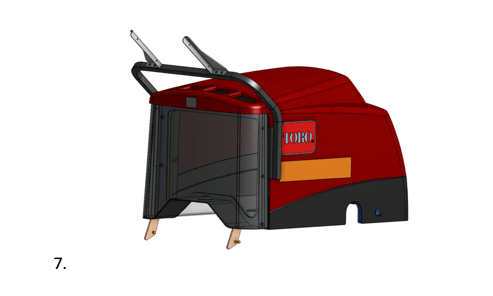
Reattach the grill panel and remount the hood onto the mower. Ensure all fastenings are securely tightened.
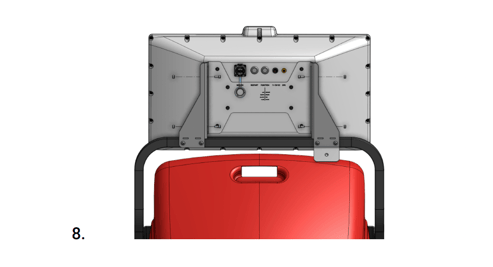
Attach the turfRad sensor to the support brackets from below. Secure the sensor using four M5x12 screws and M5 locknuts, one at each corner of the support brackets.
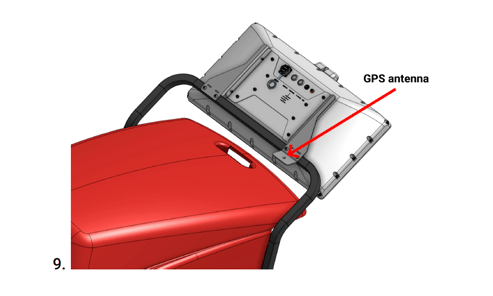
Place the GPS antenna in the position shown on the back of the sensor. The antenna is magnetic and will attach securely to the sensor housing. Connect the black cable to the gold GPS connector.
Connecting the Sensor
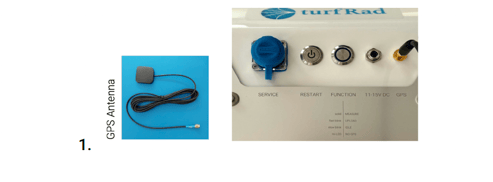
Place the GPS antenna where shown on the previous page. Then connect the black wire to the gold GPS connector.
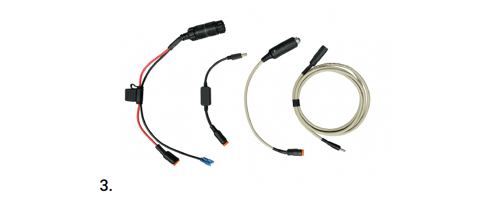 Choose the desired power cable for your setup. We recommend using the direct wiring dongle for maximum reliability of your setup. Alternatively, you can use the cigarette lighter plug or the USB Dongle. Be aware that when using the USB dongle, the USB port must be rated for 5V 2A. If using the cigarette lighter plug, ensure it works reliably and doesn’t easily lose power from vibrations (check green LED on the plug). Note: We do not recommend using the cigarette lighter plug in non-locking receptacles.
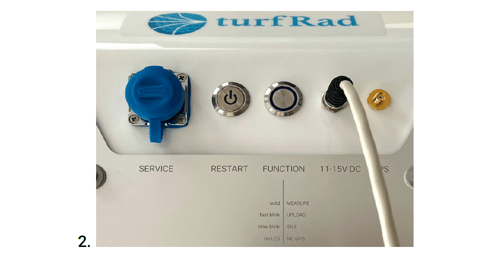
First, make sure the vehicle is powered off and it is safe to connect the power cable. Next, connect the Power Cable to your vehicle. Now connect the other end to the 11-15V DC port of the turfRad sensor. Make sure the plug is fully inserted and screwed on tightly.
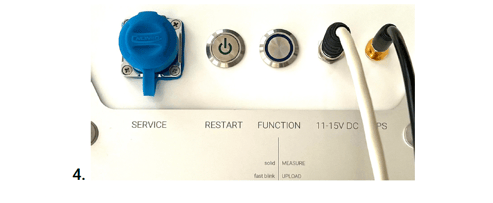
The picture above shows the connected power cable and GPS antenna. When you power on your vehicle, the LED on the RESTART button should now turn on. As soon as the GPS signal is found, the blue LED on the FUNCTION button will start to blink slowly (once per second). Note that this can take several minutes and requires a clear view of the sky.